
Hello there! I hope you enjoy this step by step tutorial on how I refinished this blue/grey table top.
 |
| Here is the table and bench after they are completed in my my customers home. The table was quite pretty to start with but with the dark stained (veneer) top did not go with the white, light brightness she wanted in her kitchen. The table was purchased at Dallas Nadeau for a STEAL and the bench was purchased from an unfinished furniture store. I DID NOT do anything to the finish on the base of the table, just the table top and the entire bench. |
 |
| Table before |
 |
| Step 1: Sand the top with medium grit sandpaper using my orbital sander. I was not sanding down the top finish just slightly taking off the shiny top coat. |
 |
| As you can see I did not sand down the top completely just until it looks a little dull. |
 |
| Step 2: Roll on one coat of latex primer. I usually use Glidden Gripper. This coat needs to be thin and will dry quickly. When this dries it will feel very rough, lightly sand with a fine sanding block just to smooth out to the touch. It should not take off any of the actual primer. |
S
 |
| Step 3: Dry brush In this finish I used three colors: a Blue grey, light grey and off white. The first color I brushed over the primer was they blue/grey color. Dry brushing is done with a chip brush. With very little paint on my brush I painted in straight long strokes covering I would say 85% of the table. Second I dry brushed on (in splotchy areas) my grey color. |
 |
| In this photo you can see the dry brushed blue/grey, a few areas of my darker grey and still a few areas I dry brushed with the white. At this point my table looks very splotchy. |
 |
| Step 4: Glaze or toner In this particular project I used toner made by Caromal Colours but you can also use a medium brown glaze. I watered down my toner a bit and just used it on corners and a few areas around the table to show a few worn spots. |
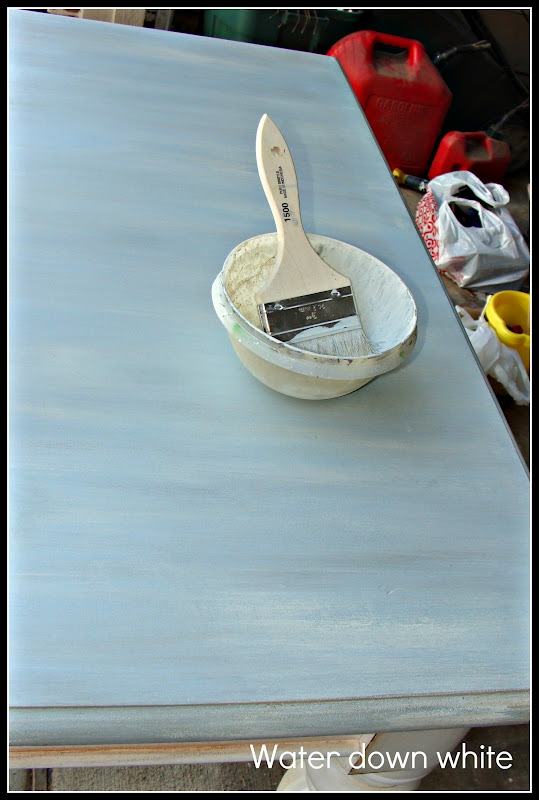 |
| Step 5: Brush on watered down white. This is the step where I started to love the finish. This will blend all the colors together and give it the beautiful blended finish. Start with the paint really watery and brush over a small section, let it sit for a second then gently wipe off with a dry cloth. Some spots I ended up going over a few times before I like the way it looked. I even dipped my rag into the watery paint and rubbed on the table in areas I felt needed lots of blending. This step is hard to explain so you will need to play with it a little. |
 |
| Step 6: Top coat your table. I used 2 coats of minwax clear wax for this project. Basically follow the directions on the can. My one piece of advice is it does not take much wax at all - if you put too much it takes too long to dry. Also, do not do this on a super hot day where the sun is beating down on your project, your wax will never dry. |
 |
| Here is the table in my customers beautiful kitchen. |


It is beautiful!! No doubt, she was happy when you finished!!!
ReplyDeleteLove it!
ReplyDelete