

So, here is how it started
.jpeg)
I spotted an empty spool at Home Depot and went looking for one of my friends (employee). He gladly gave me this one and said he would save the others for me. Whoo Hooo!
The following pictures pretty much speak for themselves but let me know if you have any questions about how to make a stool for yourself. I did use my miter saw, a drill and my sewing machine but it can easily be done without any of those tools.
.JPG) |
| I added 5 - 1x4 braces and screwed them in at both ends. After it was all finished i decided those might not be necessary but can't hurt. If you don't have a saw to cut these they should do it for you at your hardware store. |
.jpeg) |
| I used my staple gun to attach a lining. I was going to purchase inexpensive fabric for this but i had an old twin bed skirt so I used the middle piece of that (the flat piece that lays on top of box springs). |
.jpeg) |
| I set the spool on top of my 2 inch high density foam and traced the circle size. Then used my electric meat cutter (I have no idea what that is really called) to cut the foam. |
.jpeg) |
| Glued foam on top |
.jpeg) |
| Stapled two layers of batting around top and then cut off excess |
.jpeg) |
| Stapled top fabric all the way around and then cut off excess |
1. Measure how long you need the skirt to be and add 2 inches.
2. Hem the skirt 1 1/2 inches. If you don't have a sewing machine use hem tape.
3. Lay out the fabric and pin the pleats the way you want them. My pleats are 4 inches wide.
4. Iron the pleats, then keep them pinned until you have the skirt stapled on the stool.
*I used three strips of fabric to go around the entire spool. I did not sew them together, just pieced it up as I stapled. Hope that makes sense.
.jpeg) |
| Pleats pinned and ready to be stapled on. |
.jpeg) |
| Skirt is stapled on the stool and then I went around and trimmed anything sticking up to much above my staples. I stapled the skirt on to be touch the floor (or counter in my case here) |
.jpeg) |
| I added 2 - 1x2 boards to the bottom to be the feet of my stool. I thought about putting bun feet on the bottom or even casters but I already had these boards so went with that. This helped keep it level on a hard surface and made the stool another inch taller which was perfect in this case. This step is not necessary |
.jpeg) |
| Hot glued first layer of trim |
.jpeg) |
| Hot glued second layer of trim. Make sure you use a trim wide enough to cover all of the staples. |
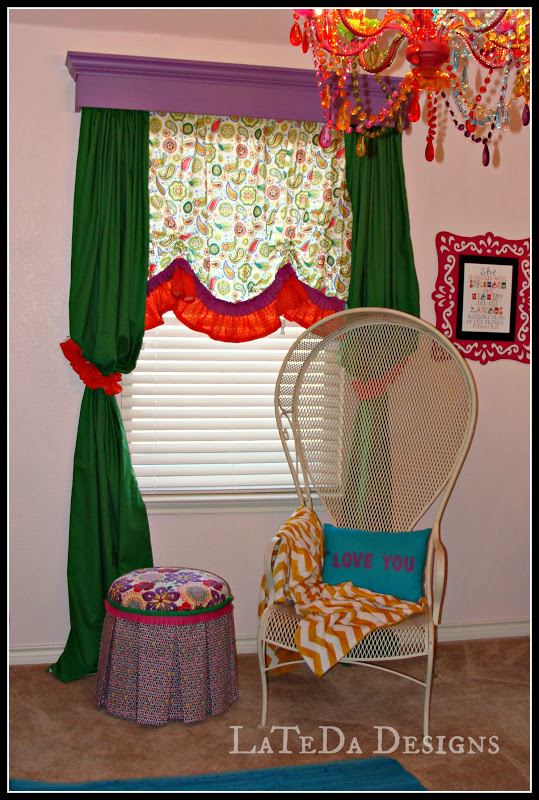
Here it is in baby Tyler's room. The skirt fabric matches one of the ruffles on the bolster pillows I made.

Let me know what you think!


