Sorry for the delay. Workshop dates are posted under DIY Classes or click here. Only one Furniture class being offered this quarter but I promise to have more offerings later in the year. Please e-mail me if you have any questions.
latedadesigns@hotmail.com
I can't wait to show you current projects I have been working on, pictures of interior paint projects and before/after interior design photos coming soon.

Wednesday, January 2, 2013


Monday, November 12, 2012
Precious Upholstered Stool
A precious upholstered stool made from a FREE electrical wire spool.

So, here is how it started
.jpeg)
I spotted an empty spool at Home Depot and went looking for one of my friends (employee). He gladly gave me this one and said he would save the others for me. Whoo Hooo!
The following pictures pretty much speak for themselves but let me know if you have any questions about how to make a stool for yourself. I did use my miter saw, a drill and my sewing machine but it can easily be done without any of those tools.
For the skirt (the hardest part)
1. Measure how long you need the skirt to be and add 2 inches.
2. Hem the skirt 1 1/2 inches. If you don't have a sewing machine use hem tape.
3. Lay out the fabric and pin the pleats the way you want them. My pleats are 4 inches wide.
4. Iron the pleats, then keep them pinned until you have the skirt stapled on the stool.
*I used three strips of fabric to go around the entire spool. I did not sew them together, just pieced it up as I stapled. Hope that makes sense.
Here it is in baby Tyler's room. The skirt fabric matches one of the ruffles on the bolster pillows I made.


So, here is how it started
.jpeg)
I spotted an empty spool at Home Depot and went looking for one of my friends (employee). He gladly gave me this one and said he would save the others for me. Whoo Hooo!
The following pictures pretty much speak for themselves but let me know if you have any questions about how to make a stool for yourself. I did use my miter saw, a drill and my sewing machine but it can easily be done without any of those tools.
.JPG) |
| I added 5 - 1x4 braces and screwed them in at both ends. After it was all finished i decided those might not be necessary but can't hurt. If you don't have a saw to cut these they should do it for you at your hardware store. |
.jpeg) |
| I used my staple gun to attach a lining. I was going to purchase inexpensive fabric for this but i had an old twin bed skirt so I used the middle piece of that (the flat piece that lays on top of box springs). |
.jpeg) |
| I set the spool on top of my 2 inch high density foam and traced the circle size. Then used my electric meat cutter (I have no idea what that is really called) to cut the foam. |
.jpeg) |
| Glued foam on top |
.jpeg) |
| Stapled two layers of batting around top and then cut off excess |
.jpeg) |
| Stapled top fabric all the way around and then cut off excess |
1. Measure how long you need the skirt to be and add 2 inches.
2. Hem the skirt 1 1/2 inches. If you don't have a sewing machine use hem tape.
3. Lay out the fabric and pin the pleats the way you want them. My pleats are 4 inches wide.
4. Iron the pleats, then keep them pinned until you have the skirt stapled on the stool.
*I used three strips of fabric to go around the entire spool. I did not sew them together, just pieced it up as I stapled. Hope that makes sense.
.jpeg) |
| Pleats pinned and ready to be stapled on. |
.jpeg) |
| Skirt is stapled on the stool and then I went around and trimmed anything sticking up to much above my staples. I stapled the skirt on to be touch the floor (or counter in my case here) |
.jpeg) |
| I added 2 - 1x2 boards to the bottom to be the feet of my stool. I thought about putting bun feet on the bottom or even casters but I already had these boards so went with that. This helped keep it level on a hard surface and made the stool another inch taller which was perfect in this case. This step is not necessary |
.jpeg) |
| Hot glued first layer of trim |
.jpeg) |
| Hot glued second layer of trim. Make sure you use a trim wide enough to cover all of the staples. |
Here it is in baby Tyler's room. The skirt fabric matches one of the ruffles on the bolster pillows I made.

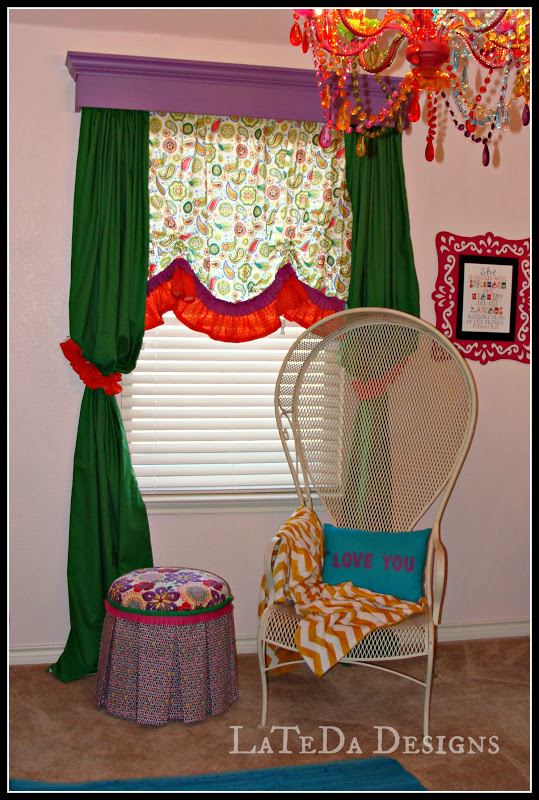
Let me know what you think!
Sunday, November 4, 2012
My baby GIRL
Still can't believe that I have a girl. She is perfect in every way and still sleeping like a princess. Here are a few photos of her recent photo shoot with Emily from Emily Megan Photography.


Thursday, November 1, 2012
Stocking Hangers
| Time to order your stocking hangers!! View design/color options that have been done in the past below. $34 per stocking hanger painted add $4 for a bow ***New this year*** Order your stocking hangers unfinished (bare MDF wood) for 1/2 the price and DIY them to match your holiday decor. Due to the fact that I am getting a late start on holiday orders I am offering for the first and maybe last time unfinished items for you to paint and decorate as you wish. $17.50 per stocking hanger (it will also include the knob hanger shown in the first photo below) Shipping is $7.50 per order. I only have a limited number of hangers this year so get your orders in ASAP. e-mail orders: latedadesigns@hotmail.com  |
| Diagonal red/green stripe |
 |
| red/gold swirl |
 |
| red/green: dot, stripe, stripe, bow |
 |
| metallic gold/light green |
 |
| red/green: bow, thick stripe |
 |
| metallic gold/silver glitter dot |
Monday, September 10, 2012
New Custom Designs and Finishes
 |
| This beautiful dinning table and chairs did not go with my customers new home colors/theme so instead of purchasing new I suggested we lighten and update the table with a custom finish. The end result looks fabulous in her new home. |
 |
| Something large was needed to make a statement over the mantle in this beautiful home full of hues of blue, grey and white. This custom piece turned out perfectly! |
 |
| Portraits sitting in your closet and a large blank hallway.......I can help! Custom frames to match colors in adjoining living space. |
Wednesday, July 18, 2012
Bathroom Mirror Upgrade
Look at this before and after! This is a great way to add character to your boring mirrors. Frame was painted to match customers decor and installed over existing mirrors.
 |
| Master Bath Mirror BEFORE |
 |
| AFTER - Custom frame installed over existing mirror. |
 |
| AFTER |
Monday, June 18, 2012
Table Top Refinish
Hello there! I hope you enjoy this step by step tutorial on how I refinished this blue/grey table top.
 |
| Here is the table and bench after they are completed in my my customers home. The table was quite pretty to start with but with the dark stained (veneer) top did not go with the white, light brightness she wanted in her kitchen. The table was purchased at Dallas Nadeau for a STEAL and the bench was purchased from an unfinished furniture store. I DID NOT do anything to the finish on the base of the table, just the table top and the entire bench. |
 |
| Table before |
 |
| Step 1: Sand the top with medium grit sandpaper using my orbital sander. I was not sanding down the top finish just slightly taking off the shiny top coat. |
 |
| As you can see I did not sand down the top completely just until it looks a little dull. |
 |
| Step 2: Roll on one coat of latex primer. I usually use Glidden Gripper. This coat needs to be thin and will dry quickly. When this dries it will feel very rough, lightly sand with a fine sanding block just to smooth out to the touch. It should not take off any of the actual primer. |
S
 |
| Step 3: Dry brush In this finish I used three colors: a Blue grey, light grey and off white. The first color I brushed over the primer was they blue/grey color. Dry brushing is done with a chip brush. With very little paint on my brush I painted in straight long strokes covering I would say 85% of the table. Second I dry brushed on (in splotchy areas) my grey color. |
 |
| In this photo you can see the dry brushed blue/grey, a few areas of my darker grey and still a few areas I dry brushed with the white. At this point my table looks very splotchy. |
 |
| Step 4: Glaze or toner In this particular project I used toner made by Caromal Colours but you can also use a medium brown glaze. I watered down my toner a bit and just used it on corners and a few areas around the table to show a few worn spots. |
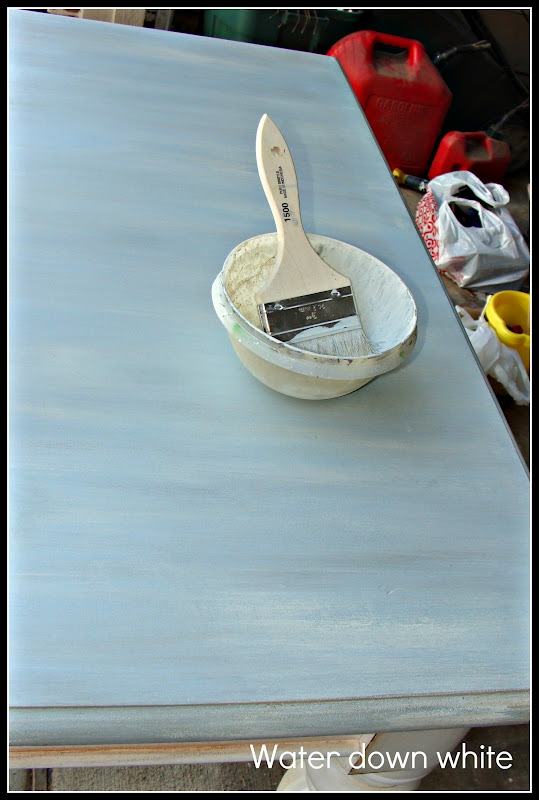 |
| Step 5: Brush on watered down white. This is the step where I started to love the finish. This will blend all the colors together and give it the beautiful blended finish. Start with the paint really watery and brush over a small section, let it sit for a second then gently wipe off with a dry cloth. Some spots I ended up going over a few times before I like the way it looked. I even dipped my rag into the watery paint and rubbed on the table in areas I felt needed lots of blending. This step is hard to explain so you will need to play with it a little. |
 |
| Step 6: Top coat your table. I used 2 coats of minwax clear wax for this project. Basically follow the directions on the can. My one piece of advice is it does not take much wax at all - if you put too much it takes too long to dry. Also, do not do this on a super hot day where the sun is beating down on your project, your wax will never dry. |
 |
| Here is the table in my customers beautiful kitchen. |


Sunday, June 17, 2012
Summer Workshops - few spots left
I have a few spots left in the June and July Summer Workshops. This will be it until 2013 due to the arrival of our little girl. Register for classes and pay deposit on right side of blog.
Click HERE for full details.

Click HERE for full details.

Friday, June 15, 2012
Three Boys!!
What a fun project! This customer has three boys under the age of 6. They each have Pottery Barn twin beds and plaid bedding so we added a Plank Board, Chalk/Magnet board, Shelf and Frame to each of their rooms to pull all the colors together.
I had my camera on the wrong setting so some of these pics are blury.


I had my camera on the wrong setting so some of these pics are blury.
Bryce's Room


Rhett's Room


Wyatt's Room


Subscribe to:
Posts (Atom)